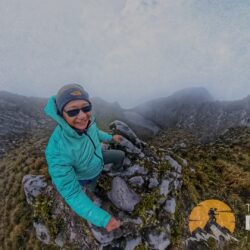
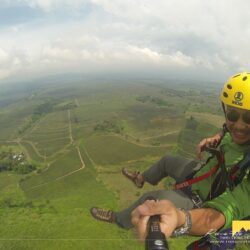
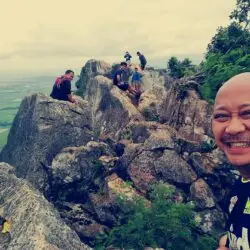
Here’s some tips I learned from experience, veteran hikers and outdoor photographers:
[ordered_list style=”decimal”]- Use a sturdy, lightweight, adequately cushioned water repellent camera bag with a rain cover. I brought a Low Pro Inverse belt bag for my essential photography gears years ago. I lost count of how many times this bag saved my gears from rain, dust, dirt, scratches and bad falls.
- “Weatherproof” your camera, lenses and accessories. Some camera manufacturer claim weatherproofing of their camera and lenses, but the harsh environment of the tropical forest is just too much for these gadgets. I either use bubble wraps for my lenses or zip locked it inside my camera bag. My camera has a water repellent “slid inside” bag cover tied on its straps. I use this to cover my camera when its hanging around my neck during shoot intervals. This is my first layer of defence agains dirt, dust, water and scratches. As a back up, I bring a large garbage bag to put all my gears immediately during heavy rain. (Edit: I now use overboard bags 🙂 )
- Bring a boxed desiccant inside your camera bag. Temperature can be freezing up there and sometimes, and your camera gets that familiar “fogging” on glass surfaces. Changes in temperature imperils your camera sensor and lenses. Fungi loves to grow in humid environments. Desiccants reduces humidity. This might not totally prevent your cam/lenses from getting “infected” by fungi but at least it minimizes the chances of it growing on your sensor and lenses.
- Keep your camera batteries warm at all times. Wrap it with a cloth before putting it inside water sealed plastics (ziplocks). At night when temperature are freezing, I keep my batteries wrapped in my jacket or place it near my body to warm it a bit. This way, it wont drain fast. Even freshly charged batteries drain when exposed to cold temperatures. What i do is I cycle using my batteries every time to allow heating it a bit.
- Only switch lenses when there’s a need for it. Better if you bring another camera body for your second lens. If you need to change lenses, do it under a sheltered environment, inside your tent or inside your bag. That way you lessen the chances of dust and dirt finding its way inside your cam and lenses.
- Keep the changing of lenses, batteries and memory cards inside a sheltered environment, like a tent or a bag, away from humid, damp environment or rain. If your camera accidentally get wet, turn it off immediately, wipe the externals of the case immediately with a dry soft cloth, then remove the batteries and card. Let it air dry first, before using. If you have a doubt if its still wet or the innards were contaminated with water better not to use it at all until it is seen by a technician. Again, here is the advantage of having a second cam body.
- Always fit your lenses with a cap when not in use or use a lens filter whenever possible. A regular anti glare (UV rays) filter will save the front of your lens from bumps, scratches and dirt. For landscapes and with a good clear sky as a backdrop, I take advantage of my CPL and ND filters to act as “protector” and highlight the blue sky.
- Never let your camera hang in your neck when your climbing on all extremities-hands and feet. Put it inside your camera bag first. Whenever you lean forward, the cam swings in front of you and will probably hit a wall, or worse, a hard object. I was just lucky I only broke a UV filter when I did that.
- Shoot with a tripod whenever possible. If your position does not allow for the use of a tripod, look for a stable arm rest, a stable ground, or a wall to rest your elbows/arms before taking a shot. Aside from less shaky photos that you get, it also keep you constantly aware of your surroundings and the area your taking photos at. The risks we take during a photo shoot, often wandering into unstable ground just to take shots is just too much not to mind.
- Always shoot and hike together with a buddy. A guide, a porter or a friend will serve as your lifeline while doing some perilous photo hike. Though it may look quite expensive to pay someone to accompany you, your buddy’s help in times when you need them – like carrying your other gears, holding your rope line, when ascending/descending a ravine/cliff taking pictures or sometimes just the fun of talking to someone while hiking, its all worth the expense you incur.
There you go. I have a few more tips up my sleeve but I’ll share it as soon as I’ve tested it up there when I photo hike! If you have photo hiking tips, share it here by commenting below.
Enjoy some of my best travel at Twelve Inches Behind.


Ayan pwede na mag comment! Liking the new look of your site ah, ang linis!
Great tips Doc, except for the keep your battery warm, everything you said is new to me hehe
Master Christian, Ikaw pa! natutunan ko yang painitin ang battery, sa yo! Though sometimes, I tried my armpits as a warmer….(hahah)
i broke 2 digicams in the outdoors— one in mt. hamiguitan, the other in hundred islands. sadly, my dslr is now in the shop after a big fall in 1 of laguna’s 7 lakes…
My camera has been with me underground spelunking, high on top of the mountain , falls beaches etc, but I never tried dropping it “unprotected” inside my camera bag. It happens to even the most careful travel photographer, so don’t feel bad :). One thing about badly beaten camera is that its value increases for you because of memories you have with it) but its resale value drops, so take care of your gears
Great tips doc!
Thank you Lantaw. I’m already thinking of finding that poor man’s pelican you suggested..Thanks for the tip!
At least hindi pa ako nakapag try na gumawa ng mga extreme outdoor photography like this one…..Good thing that I have a good friend who is knowledgeable in taking care of camera….at kampante na akong gawin ang kanyang mga tips. Nice tips my “good friend”.
Bonz, di pa tayo extreme photography nyan. It’s just photo hiking and I’m pretty sure you’ll get into this reading your blog 🙂